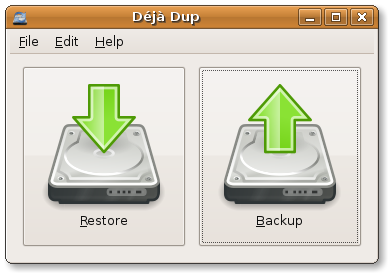
Déjà Dup is a Gnome-based backup tool that aim for easiness. It provides transparent encryption of your data, can store to an external hard disk or a remote storage (SSH server or Amazon S3) and offers schedule backup.
The tool is extremely simple to use. It offers two big buttons, one for manual backup and one for restoring. Those two functions are accessible in the menu too, as well as preferences and help. That is all.
So how does it work?
Installation
To install it on Ubuntu 8.10 and earlier release, follow the instruction about adding a Personal Package Archives (PPA), the specific data for Déjà Dup are on the project PPA page in Launchpad. Once done, just install Déjà Dup like you would install any other software on Ubuntu: Applications -> Add/Remove…
For newer Ubuntu release, just install it  it is already there waiting for you!
First launch
Déjà Dup is located in the Applications -> Accessories menu.

In the preferences of the application (menu ‘Edit’ -> ‘Preferences’), you can set the default destination storage. The choice is ‘Amazon S3‘, ‘SSH‘ or ‘Local folder‘. Local folder is probably misleading as this can be an external hard disk. SSH means that the storage is a distant server using the SSH protocol, if you do not know what it is, forget it for now. I will perhaps explain in a future post what is SSH. Finally, the last choice is Amazon S3.
Amazon S3 is a cloud storage, a form of cloud computing but only for storing data. The user pay a monthly fee in proportion to the storage area used, to the amount of traffic generated and the number of request performed. To get an idea, I have backup about 770MB, 200 files, it took about 3 hours to upload the data, and Amazon is going to charge me 0.11 USD (not including the tax) for that.
If you select Amazon S3 for storage, you will be asked to provide your access key and a folder. The access key can be found on you Amazon account, look for the Access Identifiers section. As for the folder, this is a virtual concept, but it is wise to set it to something like /[machinename]-[username]/ where machinename and username are the computer name and the user who perform the backup. Thus, you can manage backups from multiple computer and users on a same Amazon S3 account.
The rest of the preferences is straight forward. You can set what folder to backup or exclude, if you want encryption of your data or not (this is recommended if you store your data on a remote server) and if you want to schedule regular backup.
Backup
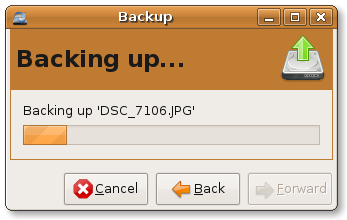
This is as simple as clicking the big backup button. You might be requested to enter a password to encrypt the data (if you choose so in the preferences), and then you will be asked to enter your Amazon secret access key. That’s it, now you can watch the data transferring or do something else.

Restore
As simple as the backup! Click on the restore button. You might be requested to enter a password to encrypt the data (if you choose so in the preferences), and then you will be asked to enter your Amazon secret access key. After that you will be requested which point in the past you want to restore data from, and then where you want to restore those data (original location or new one). That’s it, your data are being restored.
Known issue and things to take care of
For the moment, you cannot restore part of a backup. You have to restore it completely and then pick up your precious data. As of now, Déjà Dup is more oriented for disaster recovery (get back all your data) than finding back a particular document that you accidentally deleted.
Déjà Dup won’t (yet) check your filesystem if it has enough disk space to restore the data. Furthermore, it is restoring your data in a temporary folder under /tmp before moving the file to the destination folder. Which means that you must have enough space available on /tmp to be able to restore your data.


Thank you SOOOO much for writing this.
I am new to linux, but was aware of s3 and today found this great deja dup. Your review was very helpful in explaining how to use. Thanks.
This brings such an easy and affordable option to Ubuntu, a incredible operating system for my old laptop.
I’m happy this helped you
Thank you for this info. This will work nice w/FreeNAS.