Changelog:
- 2015-08: initial release
- 2015-08: add upgrade to Jessie instructions
- 2018-03: update instructions for Raspbian Stretch.
I’m going to explain how to install Raspbian (latest is based on Debian Stretch, dated 2018-03) on a Raspberry Pi which is only connected to the network using a Ethernet cable (of course your Raspberry Pi should be connected to a power source).
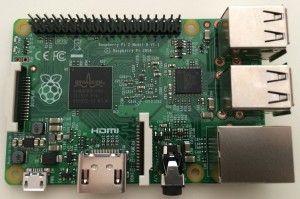 This guide should work for all Raspberry Pi supported version with an Ethernet interface (B, B+, 2, 3 and 3-B+). It could potentially work without an Ethernet interface if you have a WiFi USB dongle or a Raspberry Pi with an integrated WiFi which is supported out-of-the box by the RPi. I’ve tested the following on a Raspberry Pi 2 and a Raspberry Pi 3 B+. This guide assumes that you are doing all steps from a Unix machine (I’ve done them from Fedora Linux but it should work on any Linux, BSD or OS X with potential adaptation). It is possible to do it on Windows I suppose, but I don’t have Windows and can’t explain.
The steps are:
- Flash the Raspbian image to a SD card;
- Sync everything and mount the second partition created;
- Modify files on the SD card to allow SSH (and optionally configure WiFi);
- Put the SD card in your RPi and plug the power;
- Wait a couple of minute for thing to settle;
- Either check your DHCP server (e.g. your router) for the RPi IP address, or scan your network);
- Connect to your RPi using SSH and finish the setup;
- (option) Upgrade to Debian Jessie (you will have to view the full article)!
Flash the Raspbian image to a SD card
 There are already numerous guides online on how to do that. So I will be brief, but refer to those guides for your exact configuration. I assume a new SD card which has already a Windows FAT partition with a size bigger than 4GB (I recommend 16GB). When I plugged that SD card on my laptop it was recognised as
 /dev/mmcblk0p1 and automatically mounted. First we need to unmount this partition and then to remember the device name (without the partition suffix, so /dev/mmcblk0 in my case). Note that if you are on BSD or OS X those steps are slightly different, check online. Using the device name we can flash the Raspbian image (after downloading the zip file, check that the SHA-256 checksum match, you can either pick-up the normal or the Lite version of Raspbian, but if your goal is a headless server, then the Lite is more suitable).
$ sudo umount /dev/mmcblk0p1
$ unzip -p 2018-03-13-raspbian-stretch-lite.zip | sudo dd bs=4M of=/dev/mmcblk0 oflag=dsync status=progress
$ sync
After doing the above you should have now 2 new partitions on your SD card. The first partition (suffix p1) is the boot one and is formatted as FAT (was <60MB for me). The second one (suffixed p2) is the root partition and is formatted as ext4 (roughly 3GB). That’s the partition /dev/mmcblk0p2 which is interested for the next step.
Allow SSH access
 For pre-systemd Raspbian releases (up to Wheezy, or Debian 7), you need to mount the second partition now, So create first a mount point and then mount the partition to it.
$ sudo mkdir /mnt/rpi
$ sudo mount /dev/mmcblk0p2 /mnt/rpi
$ cd /mnt/rpi/etc
$ sudo mv rc2.d/K01ssh rc2.d/S01ssh
$ sudo mv rc3.d/K01ssh rc3.d/S01ssh
$ sudo mv rc4.d/K01ssh rc4.d/S01ssh
$ sudo mv rc5.d/K01ssh rc5.d/S01ssh
For systemd-based Raspbian (from Jessie or Debian 8), you simply need to have the file ssh (or ssh.txt) created in the “boot” partition which is the 1st partition.
$ sudo mkdir /mnt/rpi
$ sudo mount /dev/mmcblk0p1 /mnt/rpi
$ sudo touch /mnt/rpi/ssh
That’s it!
Optional WiFi configuration
 Optional: if you do not have an Ethernet interface and need to use WiFi, you need to add the WiFi configuration (your SSID – or WiFi network name – and your WiFi password). Assuming you have something like WPA2-PSK, you simply need to edit the file
 /mnt/rpi/etc/wpa_supplicant/wpa_supplicant.conf and add the following at the end of the file:
network={
    ssid="Your_WiFi_SSID"
    psk="Your_WiFi_password"
}
The network configuration on Raspbian is set to use DHCP, so after booting the system will use whatever network interface it has available and make DHCP requests in order to get an IP address.
You will also have to specify your country code (in ISO/IEC alpha2 code, DE for Germany, US for USA, JP for Japan, etc.) by either modifying the existing line or by adding it. Here is an example for Iceland:
country=IS
The country code is mandatory (at least on recent Raspbian) in order to have WiFi activated. So you will need to set it up correctly if you want a headless installation using WiFi and no Ethernet.
Note: please don’t use both the Ethernet and WiFi interfaces if you they are both on the same network. Such a configuration is possible, but it won’t work out-of-the-box. So set up first one interface, make it work and then add the other one (look for online resources about how to configure Linux for 2 NIC on the same subnets).
Start Raspbian and connect to it
Now sync all changes to the SD card:
$ cd ~ ; sudo umount /mnt/rpi
Before removing the SD card from your computer, be sure that you properly unmounted it.
Now remove the SD card from the computer, insert it in the Raspberry Pi, plug the Ethernet cable (or the WiFi USB dongle) and then the USB power plug. The LEDs of your RPi should light up (PWR – red one – means that your power supply is good enough; ACT – green one – should not be steady green, it means your SD card is not readable or was wrongly flashed, it should blink). After the RPi has completed boot up, the ACT LED should be off (mostly), meaning that there are no more I/O activities going on. That’s when you can be sure that the RPi has sent its DHCP probes and should have an IP address assigned.
If you have a proper router which register a DNS entry for each DHCP clients, you should be able to directly login to your Raspberry Pi by doing:
$ ssh pi@raspberrypi
If you router does not support such feature, you will need to know your Raspberry Pi IP address, you can either go to your DHCP server (e.g. your router) and check which address was assigned to it, or simply scan your network. To scan your network you need to know your subnet (e.g. 192.168.1.0 with a netmask of 255.255.255.0) and have nmap installed on your computer (sudo dnf install nmap will work for Fedora, and it is as easy for Debian/Ubuntu-based distros as well, just replace dnf by apt-get).
$ sudo nmap -sP 192.168.1.0/24
Of course you need to adapt the above command to your subnet. The “/24” part is the netmask equivalent of 255.255.255.0. I recommend running the above command with sudo because it will display the MAC address of all the discovered devices which will help you spot your Raspberry Pi as nmap is displaying the vendor attached to each MAC address. See for yourself in the example output:
Starting Nmap 6.47 ( http://nmap.org ) at 2015-07-19 20:12 CEST
(...)
Nmap scan report for raspberrypi.lan (192.168.1.9)
Host is up (0.0060s latency).
MAC Address: B8:27:EB:1E:42:18 (Raspberry Pi Foundation)
(...)
Nmap done: 256 IP addresses (8 hosts up) scanned in 2.05 seconds
Now you can simply connect to your RPi by using the user pi and password raspberrypi (which are default on Raspbian):
$ ssh pi@192.168.1.9
The authenticity of host 'raspberrypi (192.168.1.9)' can't be established.
ECDSA key fingerprint is SHA256:WSF9Rpmh0Mr/JYUye8r69nXzwZtYbdH0xJ5M4AFYxYY.
Are you sure you want to continue connecting (yes/no)? yes
Warning: Permanently added 'raspberrypi,192.168.1.9' (ECDSA) to the list of known hosts.
pi@raspberrypi's password:
Linux raspberrypi 4.9.80-v7+ #1098 SMP Fri Mar 9 19:11:42 GMT 2018 armv7l

The programs included with the Debian GNU/Linux system are free software;
the exact distribution terms for each program are described in the
individual files in /usr/share/doc/*/copyright.

Debian GNU/Linux comes with ABSOLUTELY NO WARRANTY, to the extent
permitted by applicable law.

NOTICE: the software on this Raspberry Pi has not been fully configured. Please run 'sudo raspi-config'

pi@raspberrypi ~ $
It was advised, that you run the command sudo raspi-config especially to increase the partition size so it uses the complete SD card space available. This step is however done automatically for you on recent Raspbian.
However, you should really do one extra step: change the default pi password or create a specific account for you. You can use the command passwd to change the password on the command line.
That’s it, you have installed Raspbian on a Raspberry Pi without a screen or keyboard (headless). I strongly recommend to follow my advice about Raspberry Pi Raspbian post-installation and security.
Update: I forgot the icing on the cake: upgrading to Debian Jessie. Continue reading to learn a quick way to do it.
Continue reading “Installing Raspbian Headless (no screen, full network)”




 A headless server by definition has no input devices such as a keyboard or a mouse which provides a great deal of external randomness to the system. Thus, on such a server, even if using rotational hard disks, it can be difficult to avoid the depletion of the Linux kernel’s random entropy pool. A simplified view of this situation is if the entropy pool is deemed too low, one of the “dices” which generates random numbers is getting biased. This is can be even more exacerbate on server hosted in virtual machines, but this article won’t help you in this case.
 but that could be a story for another post and another day.