![]() Today, I will present Munin, a tool to monitor various health measurement of a system (essentially resources).
Today, I will present Munin, a tool to monitor various health measurement of a system (essentially resources).
This article is part of a series about remote administration of Linux-based server (actually some of the tool work on *BSD systems too). You can find all article pertaining to this series using the Tag remote-server-admin.
Munin – Server resources monitoring
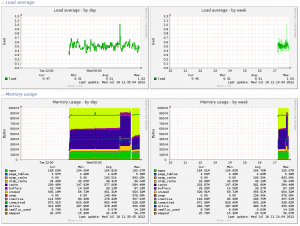
Munin offers nice timeline graphs of many resources consumption.
Munin is known to work on Linux, FreeBSD, NetBSD, Solaris and even OpenWRT (a port exists).
Installation
Apache web server is not required, but it is an easy set-up to view the Munin graphs.
$ sudo apt-get install munin apache2-mpm-worker
Configuration
As simple as allowing Apache for remote connection for Munin configuration.
Note: if you add installed Apache before, you probably need to create the following symbolic link if it does not exist:
$ [ -h /etc/apache2/conf.d/munin ] || sudo ln -s /etc/munin/apache.conf /etc/apache2/conf.d/munin
Now we can edit the right Apache file:
$ sudo vi /etc/munin/apache.conf
And check that the allowable IP are as follows:
munin/www>
Order allow,deny
Allow from all
#Allow from localhost 127.0.0.0/8 ::1
Options None
Activating the new configuration
Apache needs to reload its configuration:
$ sudo service apache2 reload
Visualising Munin
Open your favorite web browser and go to the page http://IP/munin/ Example: http://192.168.1.2/munin/

Advanced configuration
I did not go deep into the configuration of Munin or Apache. But I did the following changes which enhance the security, though I cannot tell if this is sufficient.
Munin configuration enhancement
Edit the file munin-node.conf.
$ sudo vi /etc/munin/munin-node.conf
And change the lines about the binding address to match localhost only (no remote connection allowed to the node):
# Which address to bind to;
# host *
host 127.0.0.1
Now restart Munin:
$ sudo service munin-node restart
Apache/Munin configuration enhancement
Edit the file Apache configuration file again. We are going to set user/passer access.
$ sudo vi /etc/munin/apache.conf
And uncomment a few more lines:
AuthUserFile /etc/munin/munin-htpasswd
AuthName "Munin"
AuthType Basic
require valid-user
It is necessary to create at least one user to gain access to Munin:
$ sudo htpasswd -c /etc/munin/munin-htpasswd munin
This command creates the file /etc/munin/munin-htpasswd and add a user ‘munin’, it will prompt you for a password for this new user.
To add extra users:
$ sudo htpasswd /etc/munin/munin-htpasswd huygens
Apache needs to reload its configuration:
$ sudo service apache2 reload

